To connect Beats Solo 3, simply turn on Bluetooth on your device and hold down the power button on the headphones until the LED light flashes. Then select Beats Solo 3 from your device’s Bluetooth menu.
Beats Solo 3 headphones are a popular choice for those who want high-quality wireless headphones. They offer up to 40 hours of battery life and a comfortable fit, making them perfect for long listening sessions. However, if you’re not familiar with the process, connecting Beats Solo 3 headphones to your device can be a bit confusing.
We’ll walk you through the steps to connect Beats Solo 3 headphones to your device and get you listening to your favorite tunes in no time. So, let’s get started!
Introduction To Beats Solo 3 Wireless Headphones
When it comes to wireless headphones, the Beats Solo 3 stands out as a top choice for music enthusiasts and on-the-go individuals. With its sleek design, impressive battery life, and high-quality sound, the Beats Solo 3 offers a seamless listening experience. In this guide, we’ll explore the essential aspects of the Beats Solo 3, from unboxing to key features, to help you make the most of these premium wireless headphones.
Unboxing The Beats Solo 3
Upon unboxing the Beats Solo 3, you’ll be greeted with a premium presentation that reflects the quality of the product. The packaging includes the headphones, a carrying case, a charging cable, and a quick start guide. The headphones are available in various color options, allowing you to choose a style that suits your preference.
Key Features At A Glance
Let’s take a closer look at the key features that make the Beats Solo 3 a standout choice. From its seamless wireless connectivity to the impressive battery life, these headphones are designed to elevate your listening experience. Here are some of the standout features:
- Wireless Bluetooth connectivity for hassle-free pairing with your devices.
- Up to 40 hours of battery life for extended listening sessions.
- Fast Fuel technology that provides 3 hours of playback with just a 5-minute charge.
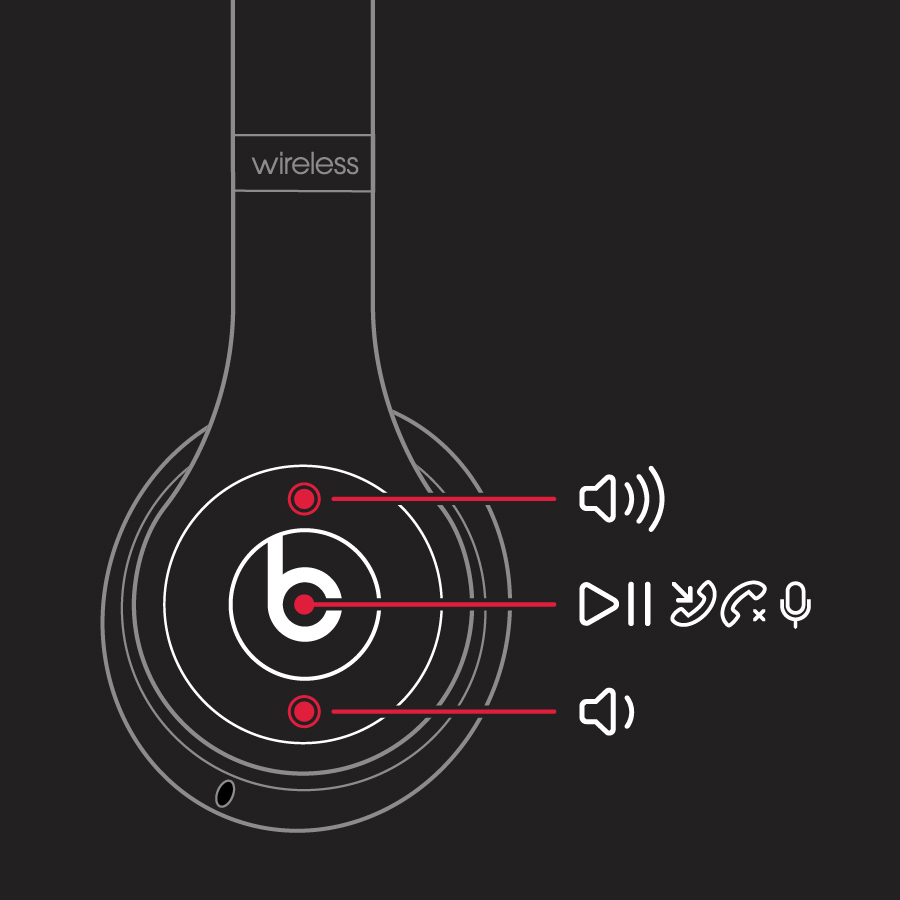
- On-ear controls for adjusting volume, managing calls, and activating voice assistants.
- Dynamic sound and acoustics for immersive music enjoyment.
Initial Setup Before Pairing
Before you start pairing your Beats Solo 3 headphones, there are a few crucial steps to complete during the initial setup. These steps include charging your headphones and powering them on for the first time. Following these steps ensures a smooth and successful pairing process with your desired devices.
Charging Your Headphones
When you first unbox your Beats Solo 3 headphones, it’s essential to charge them fully to maximize their battery life. To do this, connect the included USB charging cable to the charging port on the headphones and the other end to a power source such as a computer or a wall adapter. Let the headphones charge for at least one hour before proceeding to the next step.
Powering On For The First Time
After the initial charging is complete, it’s time to power on your Beats Solo 3 headphones for the first time. To do this, simply press and hold the power button until the LED indicator light flashes. This indicates that the headphones are in pairing mode and ready to connect to your preferred device.
Pairing With Ios Devices
Connecting your Beats Solo 3 headphones to your iOS devices is a breeze. With the seamless integration of Apple’s W1 chip technology and the convenience of managing connections via iCloud, you can enjoy your favorite music and take calls effortlessly. Let’s explore how to pair your Beats Solo 3 with your iOS devices.
Using Apple’s W1 Chip Technology
Apple’s W1 chip technology simplifies the pairing process between your Beats Solo 3 and your iOS devices. Follow these steps to connect:
- Ensure your Beats Solo 3 headphones are in pairing mode by pressing and holding the power button.
- On your iOS device, navigate to the Settings app.
- Select Bluetooth from the list of options.
- Locate your Beats Solo 3 in the available devices list and tap on it to initiate the pairing process.
- Once connected, you’ll see a confirmation message on your iOS device, indicating a successful pairing.
Managing Connections Via Icloud
Thanks to iCloud integration, you can easily manage your Beats Solo 3 connections across multiple iOS devices. Here’s how to do it:
- Ensure your iOS devices are signed in to the same iCloud account.
- Pair your Beats Solo 3 headphones with one of your iOS devices using the steps mentioned above.
- Once connected, your Beats Solo 3 will be automatically recognized and paired with all other iOS devices signed in to the same iCloud account.
- Simply select your Beats Solo 3 from the Bluetooth settings on any of your other iOS devices, and they will seamlessly connect.
With the combination of Apple’s W1 chip technology and iCloud integration, connecting your Beats Solo 3 headphones to your iOS devices has never been easier. Say goodbye to complicated pairing processes and enjoy the freedom of wireless listening.
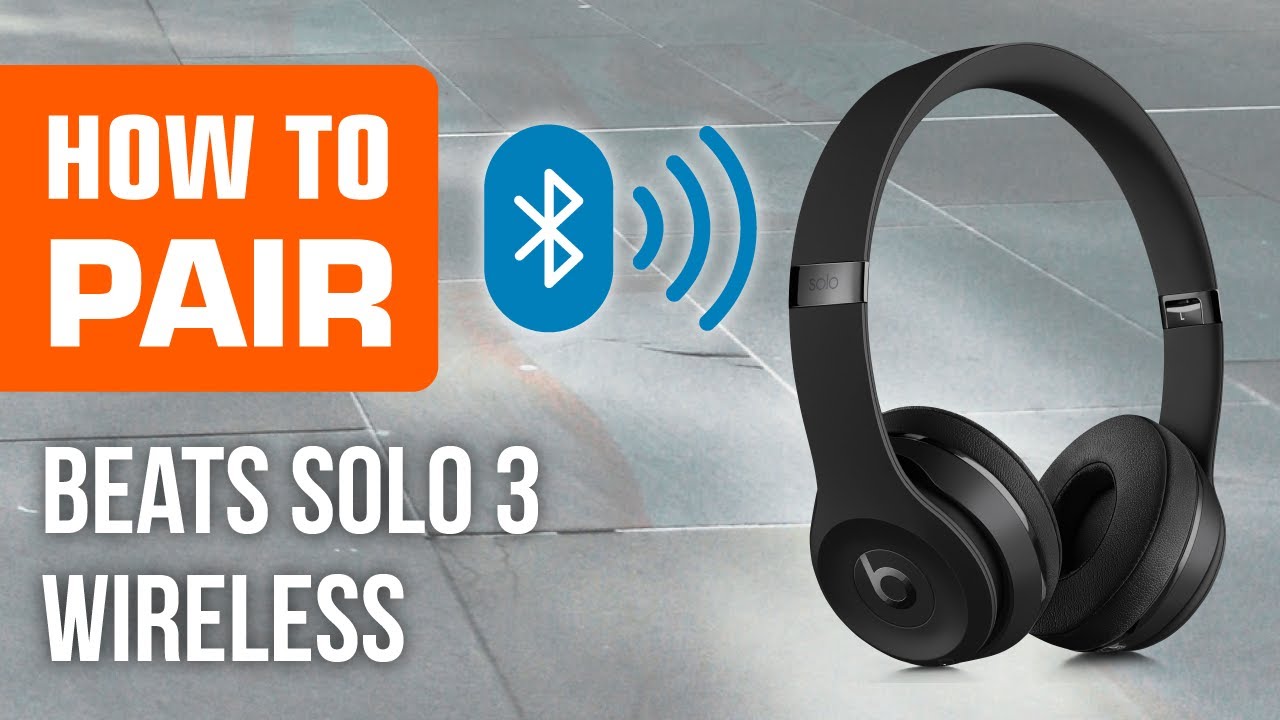
How to Connect Beats Solo 3

Credit: www.youtube.com
Connecting To Android Devices
Connecting your Beats Solo 3 headphones to your Android device is a breeze. With just a few simple steps, you’ll be able to enjoy your favorite tunes wirelessly and immerse yourself in crystal-clear sound. In this section, we will guide you through the process of enabling Bluetooth settings and troubleshoot common issues that may arise.
Enabling Bluetooth Settings
To connect your Beats Solo 3 to your Android device, follow these easy steps:
- Ensure that your Beats Solo 3 headphones are turned off.
- On your Android device, go to the Settings menu.
- Select “Bluetooth” from the list of options.
- Make sure that the Bluetooth toggle switch is turned on.
- On your Beats Solo 3 headphones, press and hold the power button for a few seconds until the LED indicator starts flashing.
- In the list of available devices on your Android device, locate and select your Beats Solo 3 headphones.
- Once connected, you will hear a confirmation sound, and the LED indicator on your headphones will stop flashing.
Troubleshooting Common Issues
If you encounter any issues while connecting your Beats Solo 3 headphones to your Android device, try the following troubleshooting steps:
- Ensure that your Beats Solo 3 headphones are charged.
- Restart your Android device and try connecting again.
- Make sure that Bluetooth is enabled on your Android device.
- Forget the previous connection on your Android device and pair your Beats Solo 3 headphones again.
- If you are still unable to connect, try resetting your Beats Solo 3 headphones by pressing and holding the power button and volume down button simultaneously for 10 seconds.
By following these simple steps and troubleshooting tips, you should now be able to successfully connect your Beats Solo 3 headphones to your Android device. Enjoy your music on the go with unmatched convenience and superb sound quality!
Pairing With Windows Pcs
To connect your Beats Solo 3 headphones to your Windows PC, you’ll need to utilize the Bluetooth functionality of your computer. Follow the steps below to successfully pair your headphones with your Windows PC.
Accessing Bluetooth On Windows
First, ensure your Windows PC has Bluetooth capability. Go to the “Settings” menu, then click on “Devices” and select “Bluetooth & other devices” to turn on Bluetooth if it’s not already activated.
Ensuring Proper Drivers
Make sure your Windows PC has the necessary drivers for Bluetooth connectivity. Visit the official website of your PC’s manufacturer to download and install the latest Bluetooth drivers for optimal performance.
Using With Mac Computers
To connect Beats Solo 3 to your Mac computer, first, power on your headphones. Next, go to your Mac’s Bluetooth settings and select Beats Solo 3 from the list of available devices. Once connected, you can enjoy wireless music streaming and hands-free calls effortlessly.
Bluetooth Preferences On Macos
To connect your Beats Solo 3 headphones to your Mac computer, you’ll need to navigate to the Bluetooth preferences on macOS. Here’s a step-by-step guide on how to do it:
- Click on the Apple menu in the top-left corner of your screen.
- Select “System Preferences” from the drop-down menu.
- In the System Preferences window, click on the “Bluetooth” icon.
- Make sure the Bluetooth on your Mac is turned on by checking the box next to “Turn Bluetooth On.”
- Press and hold the power button on your Beats Solo 3 headphones until the LED indicator light starts flashing.
- In the Bluetooth preferences window, your headphones should appear in the list of available devices.
- Click on your Beats Solo 3 headphones to select them and then click on the “Pair” button.
- Follow any additional on-screen instructions to complete the pairing process.
- Once connected, you should see the status of your headphones change to “Connected” in the Bluetooth preferences window.
Multi-device Connectivity Tips
If you want to use your Beats Solo 3 headphones with multiple devices, such as your Mac computer and your iPhone, here are a few tips to ensure a seamless experience:
- Ensure that Bluetooth is enabled on all devices you want to connect your headphones to.
- When switching between devices, make sure you disconnect from one device before connecting to another. This can be done through the Bluetooth preferences on each device.
- If you’re having trouble connecting to a new device, try resetting your Beats Solo 3 headphones by holding down the power button for 10 seconds until the LED indicator light flashes.
- Keep your headphones and devices within close proximity to maintain a stable Bluetooth connection.
- Regularly check for software updates for your Mac computer and Beats Solo 3 headphones to ensure compatibility and optimal performance.
Connecting your Beats Solo 3 headphones to your Mac computer is a straightforward process. By following the steps outlined above and keeping these multi-device connectivity tips in mind, you’ll be able to enjoy your music, movies, and more with ease.
How to Connect Beats Solo 3
Maintaining Your Connection
To connect Beats Solo 3, ensure Bluetooth is on, then hold the power button to enter pairing mode. Select Solo 3 on your device’s Bluetooth menu to complete the connection process.
Battery Life Optimization
Charge your Beats Solo 3 regularly to optimize battery life.
Keep the headphones away from extreme temperatures.
Handling Interruptions And Interferences
Avoid using other Bluetooth devices near your Beats Solo 3.
Reposition yourself for a clearer connection.
Credit: support.apple.com
Credit: m.youtube.com
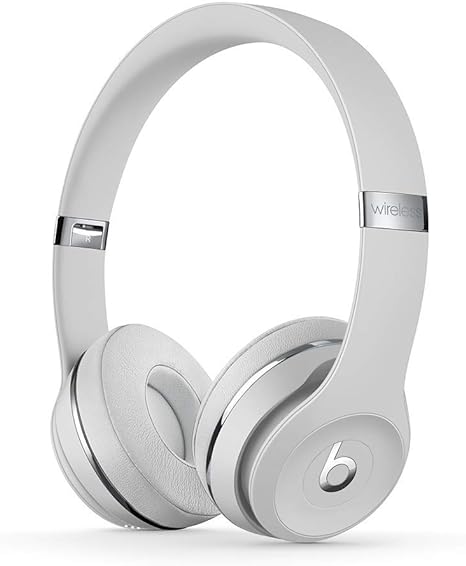
Beats Solo 3
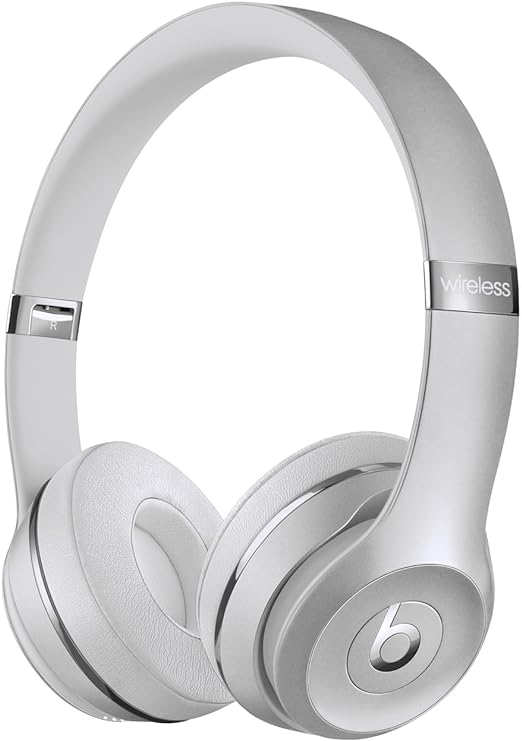
1. Beats Solo3 Wireless On-Ear Headphones – Apple W1 Headphone Chip, Class 1 Bluetooth, 40 Hours of Listening Time, Built-in Microphone – Silver
| Brand | Beats |
| Color | Silver |
| Ear Placement | On Ear |
| Form Factor | On Ear |
| Noise Control | Sound Isolation |
About this item
- High-performance wireless Bluetooth headphones
- Features the Apple W1 chip and Class 1 wireless Bluetooth connectivity
- With up to 40 hours of battery life, Beats Solo3 wireless is your perfect everyday headphone
- Compatible with iOS and Android devices
- With Fast Fuel, 5 minutes of charging gives you 3 hours of playback when battery is low
- Adjustable fit with comfort-cushioned ear cups made for everyday use
- Sleek, streamlined design that’s durable and foldable to go everywhere you do
- Take calls, control your music, and activate Siri with the multifunction on-ear controls
- The award-winning sound and design you’ve come to love from Beats, with premium playback with fine-tuned acoustics that maximize clarity, breadth, and balance
- What’s in the box – Beats Solo3 Wireless headphones, Carrying case, 3.5mm RemoteTalk cable, Universal USB charging cable (USB-A to USB Micro-B), Quick Start Guide, Warranty Card (USB power adapter sold separately)
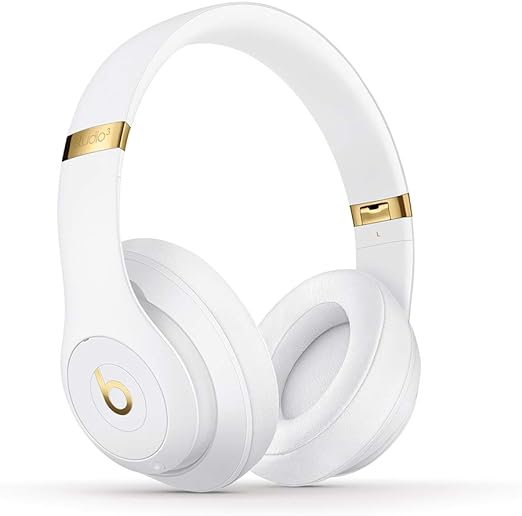
2. Beats Studio3 Wireless Noise Cancelling Over-Ear Headphones – Apple W1 Headphone Chip, Class 1 Bluetooth, 22 Hours of Listening Time, Built-in Microphone – White
| Brand | Beats |
| Color | White |
| Ear Placement | Over Ear |
| Form Factor | Over Ear |
| Noise Control | Active Noise Cancellation |
About this item
- High-performance wireless noise cancelling headphones
- Compatible with iOS and Android devices.
- Pure adaptive noise canceling (pure ANC) actively blocks external noise
- Real-time Audio calibration preserves a Premium listening experience
- Up to 22 hours of battery life enables full-featured all-day wireless playback
- Apple’s W1 chip and industry-leading Bluetooth technology keep you connected farther with fewer drop-outs
- With fast Fuel, a 10-minute charge gives 3 hours of play when battery is low. Rechargeable lithium ion battery
- Take calls, control your music, and activate Siri with the multifunction on-ear controls and microphone
- What’s in the box: Beats Studio3 Wireless headphones, Carrying case, 3.5mm RemoteTalk cable, Universal USB charging cable, Quick Start Guide, Warranty Card (USB power adapter sold separately)
3. Beats Solo3 Wireless On-Ear Headphones – Apple W1 Headphone Chip, Class 1 Bluetooth, 40 Hours of Listening Time, Built-in Microphone – Satin Silver (Latest Model)
| Brand | Beats |
| Color | Satin Silver |
| Ear Placement | On Ear |
| Form Factor | On Ear |
| Noise Control | Sound Isolation |
About this item
- High-performance wireless Bluetooth headphones
- Features the Apple W1 chip and Class 1 wireless Bluetooth connectivity
- With up to 40 hours of battery life, Beats Solo3 wireless is your perfect everyday headphone
- Compatible with iOS and Android devices
- With Fast Fuel, 5 minutes of charging gives you 3 hours of playback when battery is low
- Adjustable fit with comfort-cushioned ear cups made for everyday use
- Sleek, streamlined design that’s durable and foldable to go everywhere you do
- Take calls, control your music, and activate Siri with the multifunction on-ear controls
- The award-winning sound and design you’ve come to love from Beats, with premium playback with fine-tuned acoustics that maximize clarity, breadth, and balance
- What’s in the box – Beats Solo3 Wireless headphones, Carrying case, 3.5mm RemoteTalk cable, Universal USB charging cable (USB-A to USB Micro-B), Quick Start Guide, Warranty Card (USB power adapter sold separately)
Frequently Asked Questions
How Do I Connect My Beats Solo 3 To My Phone?
To connect your Beats Solo 3 to your phone, turn on Bluetooth and hold down the power button on the headphones until the LED flashes. Then select the headphones from the list of available Bluetooth devices on your phone.
How Do I Know If My Beats Solo 3 Is Connected?
To check if your Beats Solo 3 is connected, look for the Bluetooth icon on your phone’s status bar. You can also go to the Bluetooth settings on your phone and check if the headphones are listed as a connected device.
How Do I Reset My Beats Solo 3?
To reset your Beats Solo 3, hold down both the power button and the volume down button for 10 seconds. The LED will flash and the headphones will power off. When you turn them back on, they will be reset and ready to connect.
Why Won’t My Beats Solo 3 Connect?
If your Beats Solo 3 won’t connect, try resetting both the headphones and your phone’s Bluetooth settings. Make sure the headphones are fully charged and within range of your phone. If you’re still having trouble, contact Beats customer support for further assistance.
Conclusion
To sum up, connecting Beats Solo 3 is simple. Follow these steps for a seamless experience. Enjoy your music without any hassle. Stay tuned for more helpful tips and tricks. Let the music play effortlessly with your Beats Solo 3 headphones.

Pingback: How to Pair Beats Solo 3 Wireless Headphones: Quick & Easy Guide of 2024?